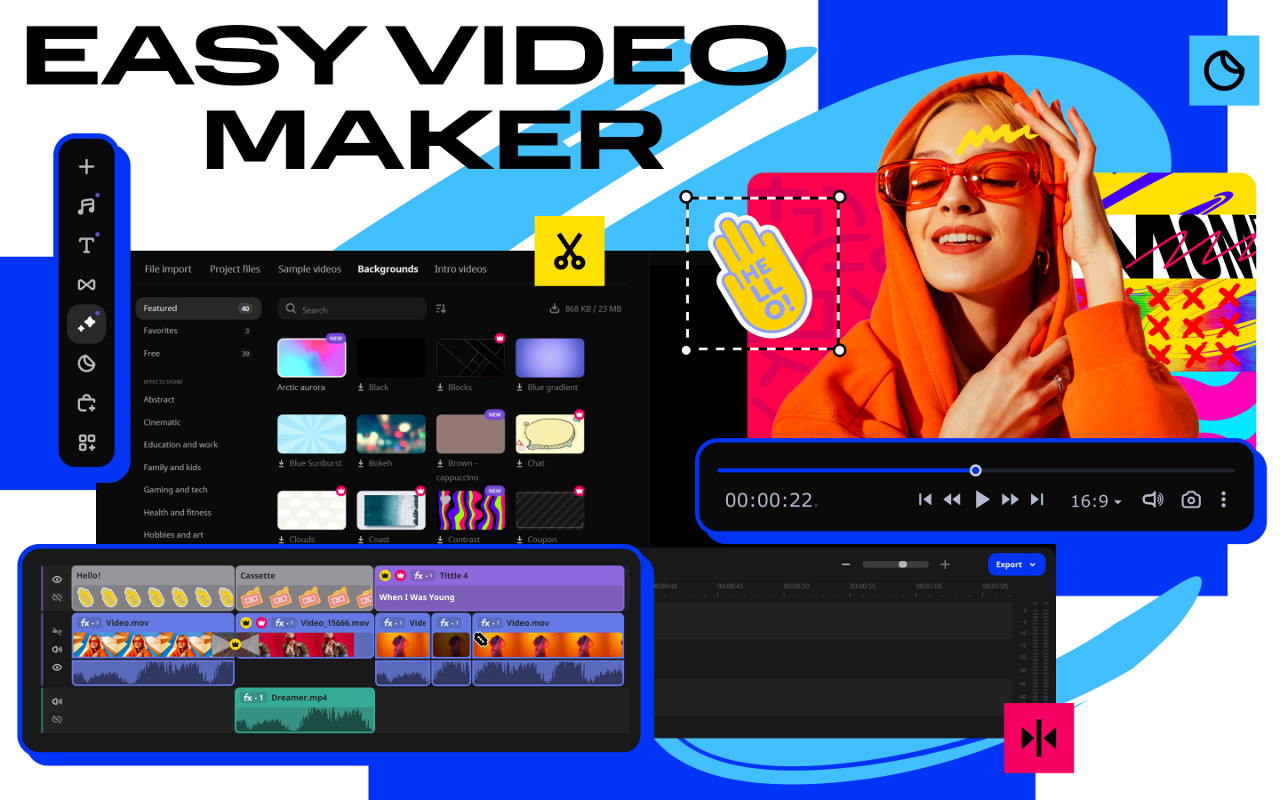
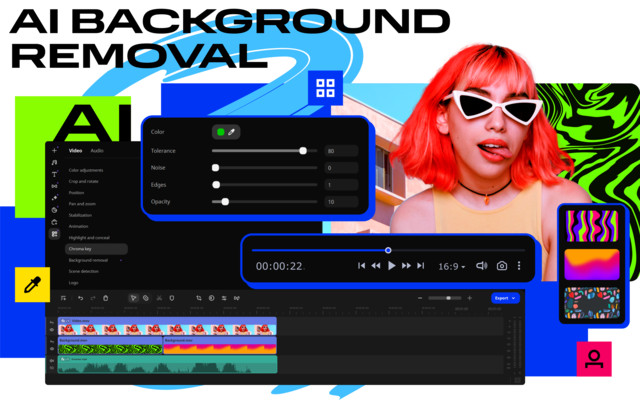
If you're on the hunt for a versatile video editing solution, Movavi Video Suite is definitely worth considering. This all-in-one video suite lets you convert file formats, edit videos, create stunning slideshows, capture your screen for tutorials, demos, webinars - it's all there at your fingertips. The user interface is clean and intuitive, making it easy for beginners to get started. Movavi Video Suite offers a wide range of customizable filters, transitions, and effects to make your videos stand out. You can easily trim, split, and merge clips, add text overlays, adjust colors, apply color correction to fix imperfections.
The Movavi Video Suite is a must-have toolkit for anyone who's serious about creating, editing, and managing videos. This suite packs an impressive collection of applications from Movavi that caters to all aspects of video production, making it a true one-stop solution. The name of this suite gives away its purpose - it's home to all the software Movavi offers for video creation and editing. And just like Movavi, this suite is known for its user-friendly approach. No steep learning curve here!
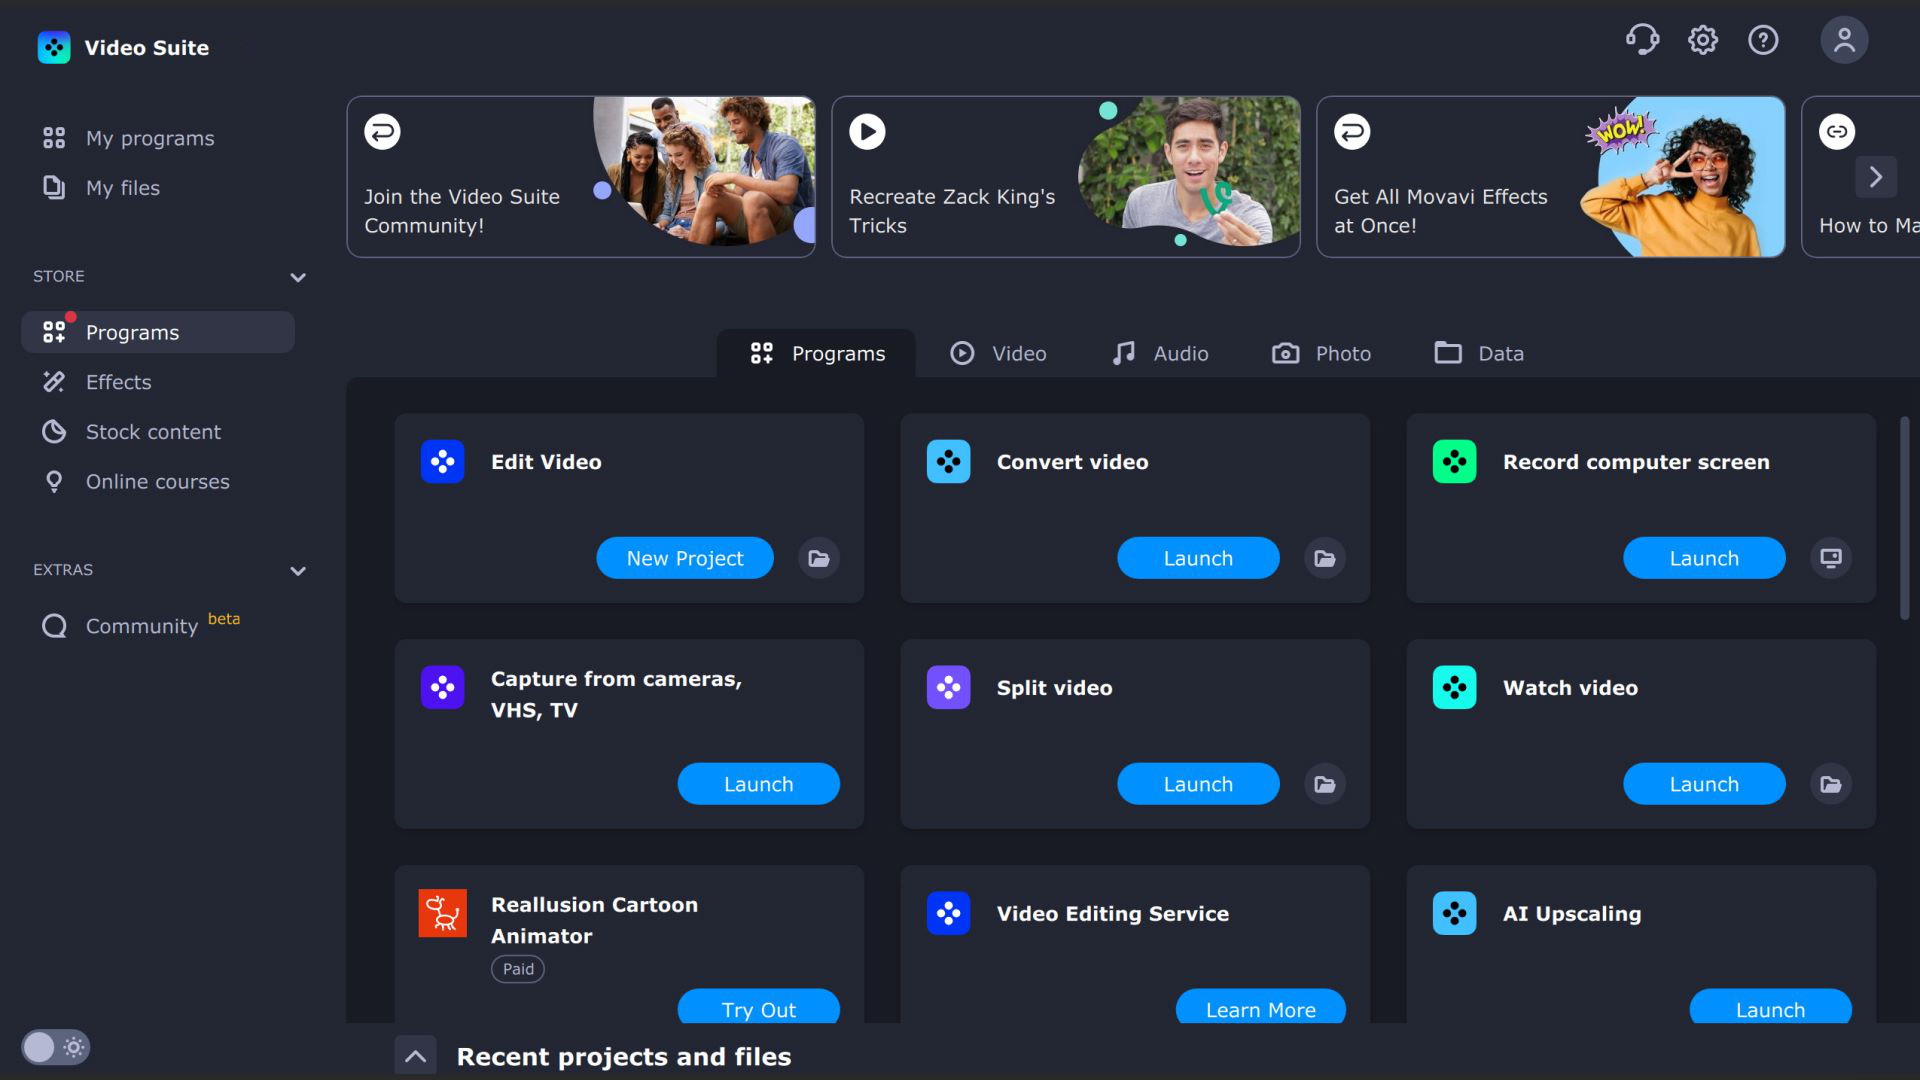
So, what exactly does the Movavi Video Suite include? It houses a range of powerful yet easy-to-use applications:
• Movavi Video Converter
• Movavi Video Editor
• Movavi Screen Recorder
• Movavi Slideshow Maker
• Movavi CD/DVD/Blu-ray Burner
• Movavi Media Player, and some handy extras
Once you open the program, you'll find all these options neatly organized. Each category presents a different set of tools, ready to be accessed with just one click. The Movavi Video Suite interface serves as your welcome center.
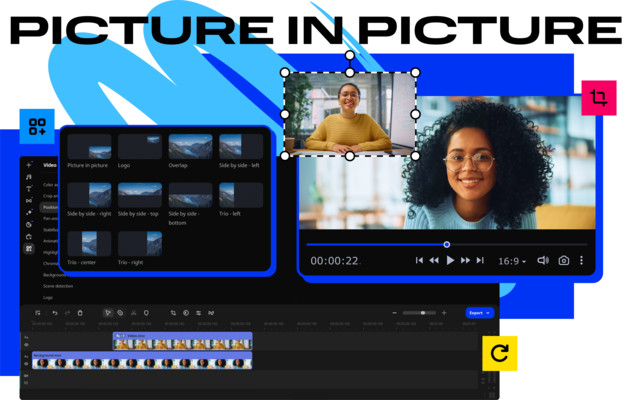
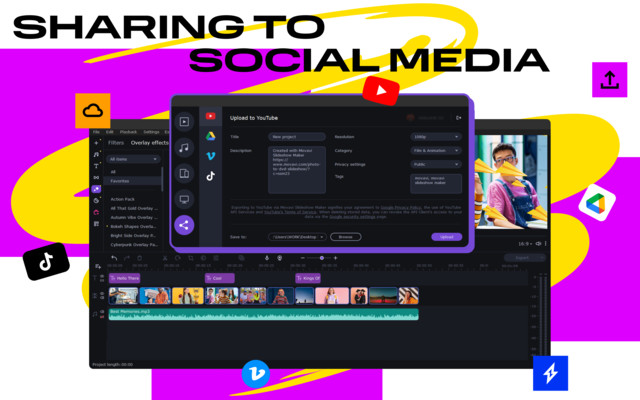
Movavi Video Suite's Video Editor stands out with its ability to create videos compatible with popular online platforms such as YouTube, TikTok, Instagram. Unlike other video editors that require extensive experience or hours of tutorial watching, Movavi Video Suite allows users to produce professional-level results very quickly, even for first-time users.
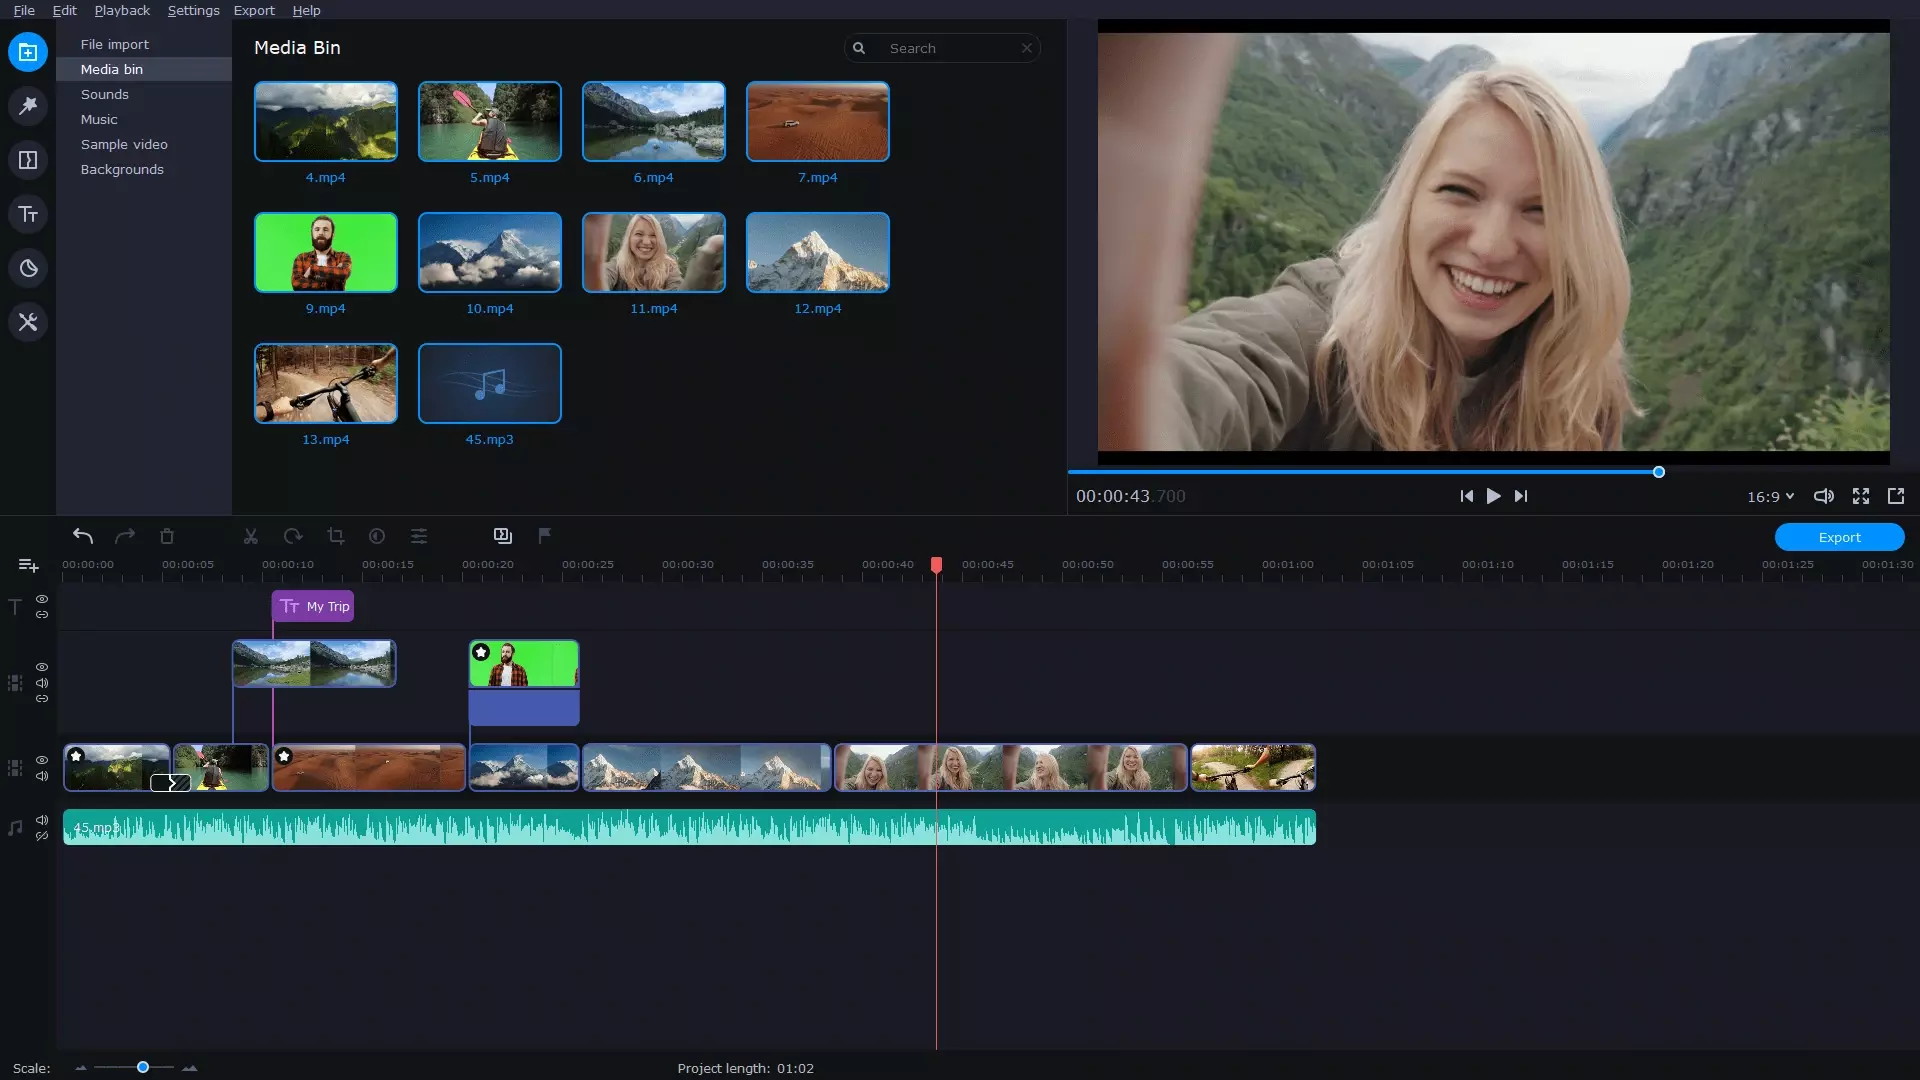
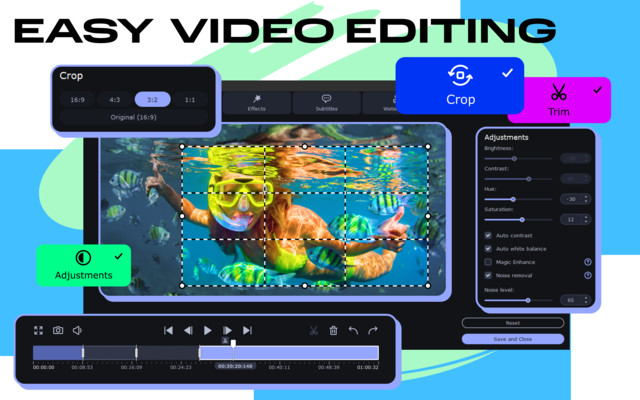
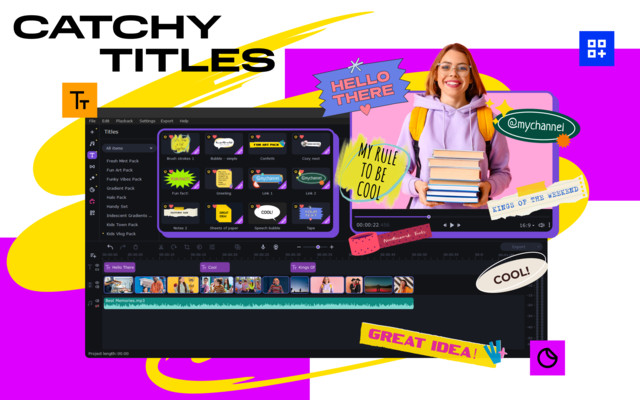
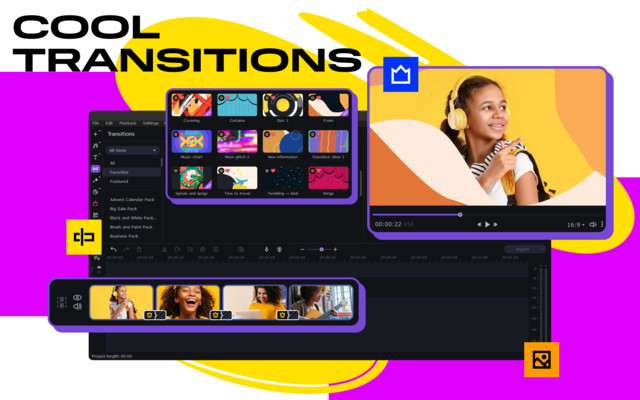
The software presents most options at a glance, minimizing the need to dig through menus to apply effects. The navigation panel on the left side is where you can easily import files and access various libraries of effects, transitions, stickers, music, and sounds. Below the navigation panel lies the Timeline, where most of your editing takes place. It's intuitive and user-friendly, allowing you to edit, cut, paste, move, and apply various options. The preview panel on the right lets you see progress and review transitions, effects, and filters before applying them to the timeline. If you prefer even more simplified editing experience, Movavi Video Suite offers the "Quick Video" option.

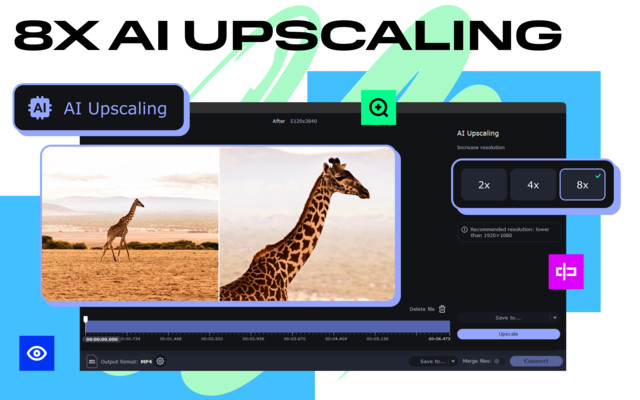
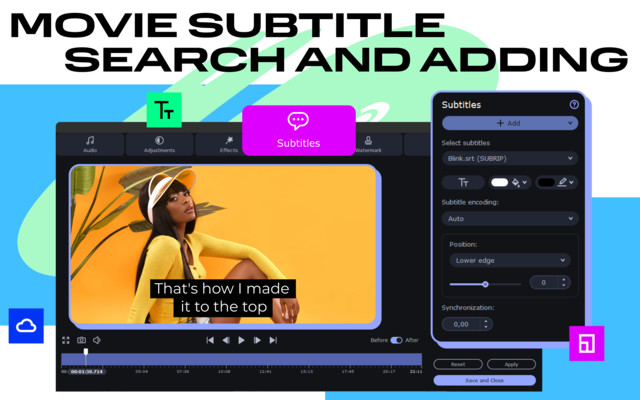
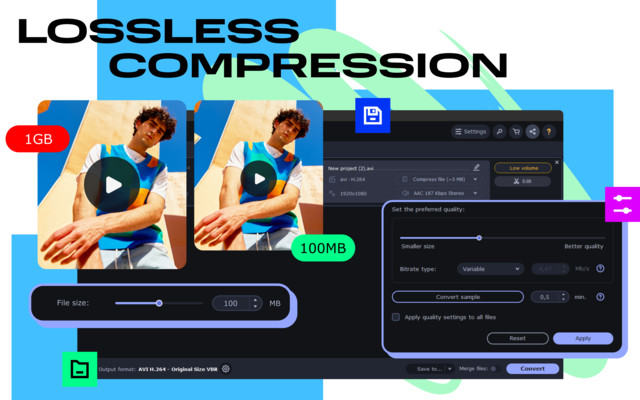
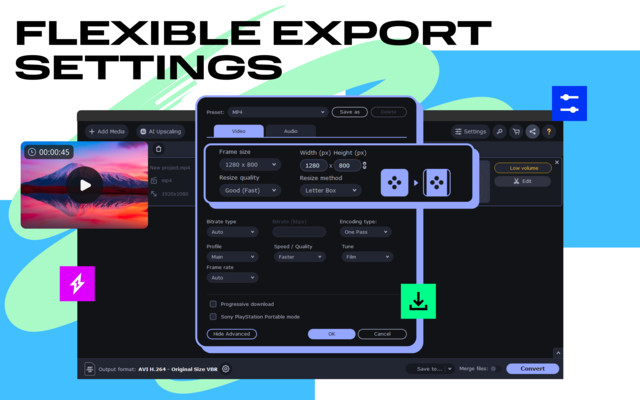
The intuitive design of Movavi Video Converter makes it simple to navigate: just drag your video file into the top panel or select it from your folders. Below, you'll find a list of available formats and optimized devices for your videos. With over 180 formats supported, Movavi Video Converter has got you covered whether you want to share your creations on social media platforms, save them for personal use, or export them for professional purposes. But the real kicker? The media converter doesn't stop at just changing formats. It also offers advanced options like adding subtitles, modifying audio settings, AI upscaling, and lossless video compressing – a feature that sets it apart from its competitors. Compressing videos without sacrificing quality is ideal for those looking to upload their content to YouTube or send large files via email.

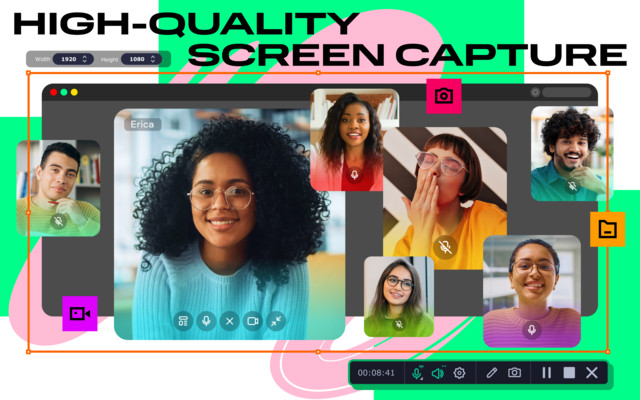
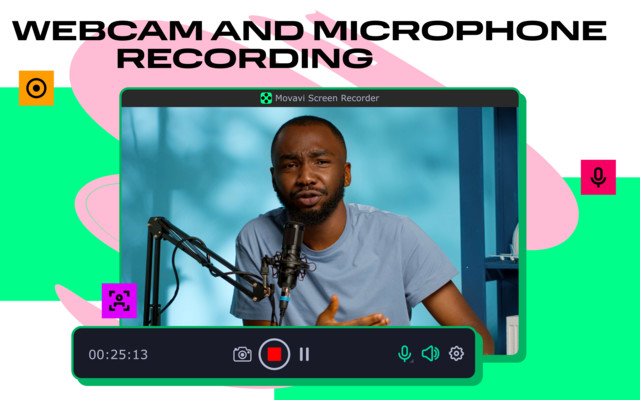
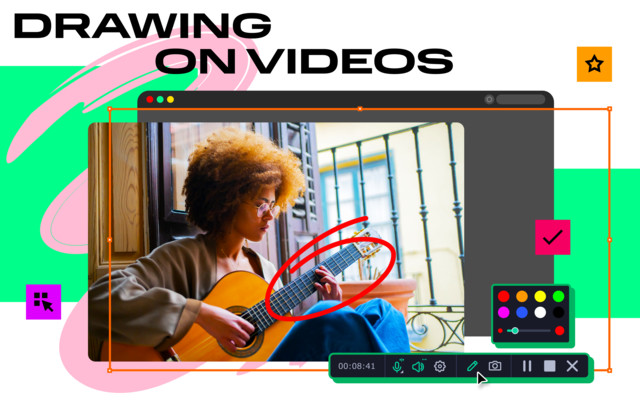
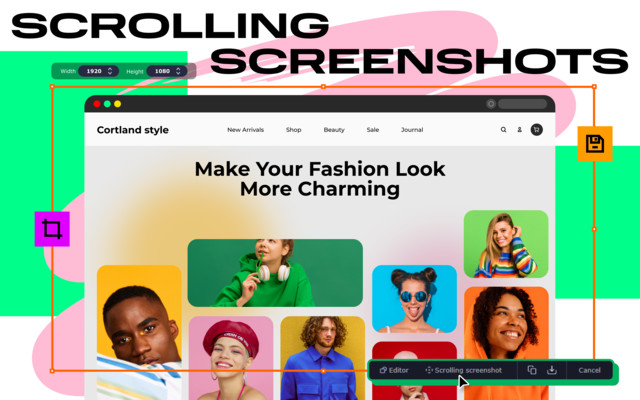
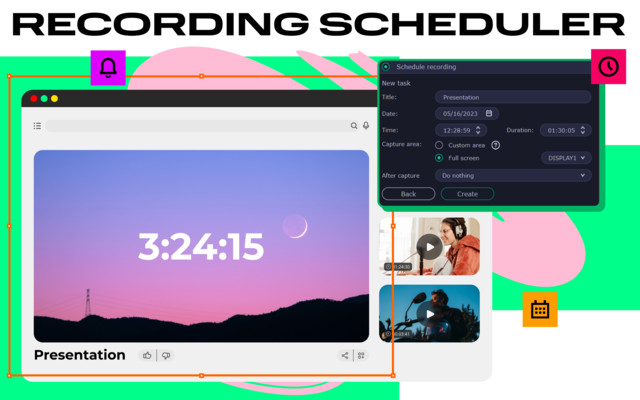
Movavi Video Suite's screen recording capability significantly enhances the process of capturing on-screen activities for various purposes. The screen recording tool allows users to capture the entire screen, individual windows, or select areas, providing flexibility in recording choices. Once you've recorded, Movavi presents various editing options, including adjusting recording length, start time, and types of cuts. Moreover, during the recording process, Movavi adds some cool features like highlighting your cursor movements and displaying pressed keys on the screen. The option to schedule recordings and capture audio separately is a major plus for content creators. This tool lets you take screenshots with ease too! Simply select an area of the screen to snap a shot, then apply quick edits like adding highlights or arrows before saving your image.

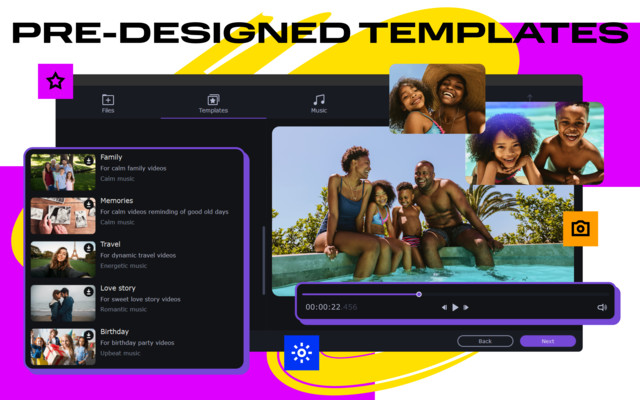
For photo enthusiasts and multimedia creators, Movavi Video Suite is a solution that brings out the best in your images and turns them into stunning slideshows. This software lets you compile an endless array of photos into a single video file, complete with custom transitions, music, and effects. Movavi's intuitive interface allows quick access to an extensive library of pre-installed transition styles, with more available from the Movavi Website.
An included Movavi Media Player is part of the package, allowing users to effortlessly preview their slideshows and play various file types.

Movavi Video Suite provides plenty of educational resources within easy reach. You can access courses and tutorials in the left panel. These free learning materials ensure you make the most out of this video editing software.
from the official website.
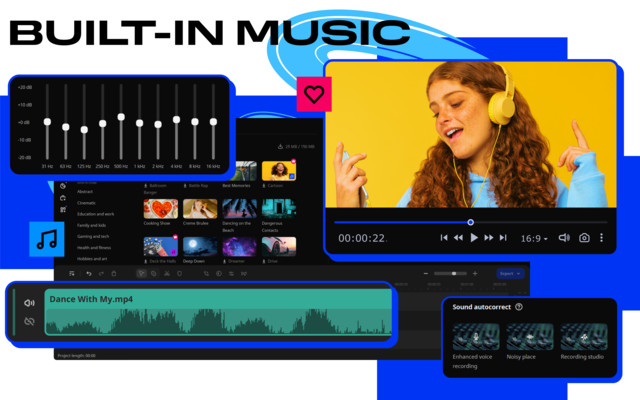
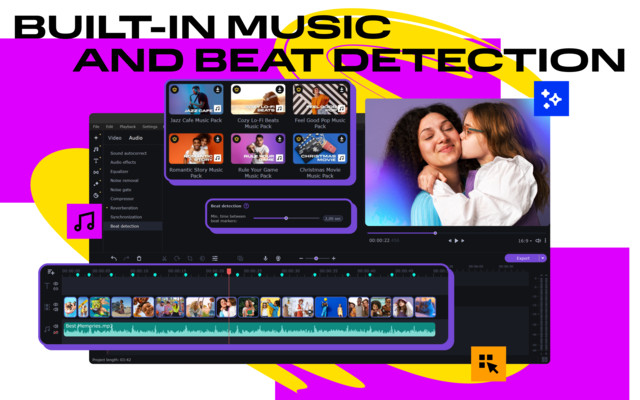
Movavi Video Suite offers additional functions such as DVD/CD/Blu-ray burning, webcam video capture, and VHS movie digitization. For travel vloggers or content creators who want to showcase their experiences on YouTube, Movavi Video Suite offers an easy way to automatically upload video clips. It is an excellent choice for creating video ads, producing original promotional content using advanced cutting and trimming features, video stabilization, slow-motion and fast-motion effects. You can effortlessly enhance the audio in podcasts or videos by recording voiceovers, adding background music and sounds. With the collection of over 100 effects and filters, you can transform your videos with distinctive visual elements. Add a vignette, balance colors, or apply stylish transitions to make your creations truly eye-catching!
